
Before I show you the progress (or lack thereof!) on the Greene's new home, I just wanted to say hello and welcome to my recent new followers :-) It's so lovely to see you here and thank you for deciding to follow this little blog (((hugs)))

So, now on to Vincent and Rachel's new home. You'll no doubt be pleased to hear, my loves, that I have now progressed a tad further than this pile of MDF pieces ~ the Greene's certainly are LOL Poor Rachel in particular is getting most anxious to have her new home built and finished so that the family can move out of their rented accommodation. Of course, it isn't quite so bad for Vincent since he is at work most of the day!

This is the start of the dry-run. DHE houses generally go together pretty smoothly I've found, so the dry-run was quite a simple building exercise. As you can see, it is a nice sized house. Since it has opening sides as well as the front, I have mounted it on a turntable for easy access ~ and it should make turning the house for decorating easier too.

This is the landing area with the opening up to the loft space. As you can see, sweetie~pies, it really isn't in the most convenient of places ~ especially as I want to fit permanent stairs up to this area instead of using the loft-ladder which came with the kit! I remembered that I have a metal spiral staircase kit, which I've had for a good few years (so long, in fact, that I can't even remember why I bought it in the first place!) and have been playing around with it. I shall have to cut a new opening into the loft space to accommodate the new staircase.

The loft area will be Rachel and Vincent's bedroom. I have decided that the roof will have to have a number of alterations to make this space more user-friendly, so I have been looking at various pictures of similar real-life and model houses. The front roof panel will remain the same (as shown in the photo above) other than having the chimney-stack on it, placed higher up (I will have to cut the stack down in height somewhat) ~ the internal chimney-breasts will then run up through the centre of the house. I sort of have a picture in my head of how it will look ~ I just hope it will translate to the actual house satisfactorily!
 |
| image from Hobbies |
 |
| image from Hobbies |
I will make dormers for the two side panels, similar to those in the pictures above (Park House plans are available from Hobbies). In its normal state, the roof panel opposite the chimney removes for access into the loft. I intend to have all four roof panels permanently fixed in position as I am going to build, in effect, a more or less panel-size dormer on the rear of the roof. Instead of removing the roof panel for access, I intend to make it such that the window wall opens.
I do hope that all makes sense, my loves ~ now that I have read what I have written here, it seems a teensy wee bit confusing even to me! Hopefully, if all goes according to plan, you will eventually see what I have been rambling on about ;-)

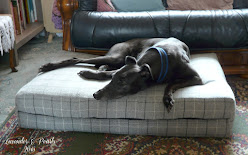
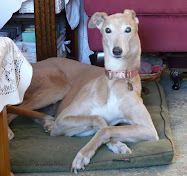
I thought I would leave you with a photo of Daisy inspecting the house :-)


3 comments:
It looks like you have a good start on your house. I look forward to seeing the progress. Daisy is a real cutie, I hope she's a good inspector.
Thank you for dropping by and leaving a comment, Mary (((hugs)))
I must confess that the Greene's new home has been sitting on my dining table in the "dry-run" stage for far longer than it should LOL I just seemed to lose my enthusiasm for the project. But I'm ready to get going again ~ not least because it would be nice to have the whole dining table back in use again ;-)
Sharon, I know what you mean about kits sitting far too long. This one looks as if its challenges will be great fun for you. :)
Post a Comment